
Debian packages and repositories are everywhere, yet many people don’t understand that creating them is actually pretty easy. While there are dozens of tutorials out there, none of them seemed to really show a good step-by-step. This is a quick tutorial on how to create a Debian package from scratch, and how to create a simple Debian repository.
Content
- 1. Demo package ‘netutils’
- 2. Create a Debian package
- 3. Create and use a Debian repository
- 3.1. dpkg -i vs. apt-get install
- 3.2. Locally configured Debian/APT repositories (/etc/apt/sources.list.d/*.list)
- 3.3. The APT cache and Packages/Packages.gz files
- 3.4. Creating a local Debian repository
- 3.5. Adding the local Debian repository and installing via apt-get install
- 3.6. Listing and installing older versions
- 3.7. Normal/typical repository layout
1. Demo package ‘netutils’
For the sake of this tutorial, we’ll create a package called netutils with a command called ipaddr. The purpose of the command will be to get the external IP address, just like this:
|
1 2 3 4 |
# Target command 'ipaddr' as part of the # to-be-built 'netutils' package $ ipaddr 82.143.12.32 |
2. Create a Debian package
Let’s start by creating the empty project directory netutils/. This folder will contain both the source code and the Debian build instructions.
2.1. Create the debian/ directory
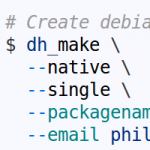
For now, we’ll use the dh_make command to create the debian/ directory:
|
1 2 3 4 5 6 7 8 9 10 |
# Create empty project folder $ mkdir -p Debian/netutils $ cd Debian/netutils # Create debian/ folder with example files (.ex) $ dh_make \ --native \ --single \ --packagename netutils_1.0.0 \ --email phil@example.com |
This created the debian/ folder. Explore them! Especially the example files (*.ex) as well as most importantly the files:
- debian/control
- debian/changelog
- debian/rules
There are maaaany files, and Debian documented all of them in the Debian Maintainer’s Guide. For now, we don’t care about the rest of them, but here’s a list of all the created files:
|
1 2 3 4 5 6 7 8 9 10 11 12 13 14 15 16 17 18 19 20 21 22 23 24 25 26 |
$ find debian/ | sort debian/ debian/changelog debian/compat debian/control debian/copyright debian/netutils.cron.d.ex debian/netutils.default.ex debian/netutils.doc-base.EX debian/docs debian/init.d.ex debian/manpage.1.ex debian/manpage.sgml.ex debian/manpage.xml.ex debian/menu.ex debian/postinst.ex debian/postrm.ex debian/preinst.ex debian/prerm.ex debian/README debian/README.Debian debian/README.source debian/rules debian/source debian/source/format debian/watch.ex |
2.2. Build the first (empty) package
As you can see there are a lot of files to tweak the package, but for now we’ll ignore all that and build an empty package. The dpkg-buildpackage command can be used to do that:
|
1 2 |
# Build empty package $ dpkg-buildpackage |
That’s it! That command built four files:
|
1 2 3 4 5 6 |
# Explore the files that got built $ ls -1 ../netutils_* ../netutils_1.0.0_amd64.changes ../netutils_1.0.0_amd64.deb ../netutils_1.0.0.dsc ../netutils_1.0.0.tar.gz |
- .tar.gz: Source package, contains the contents of the netutils/ folder
- .deb: Debian package, contains the installable package
- .dsc/.changes: Signature files, cryptographic signatures of all files
Obviously, the most interesting file (for now) is the .deb file.
Let’s examine the contents with the dpkg -c (aka dpkg --contents) command:
|
1 2 3 4 5 6 7 8 9 10 |
# Listing the contents with 'dpkg --contents' $ dpkg -c ../netutils_1.0.0_amd64.deb drwxr-xr-x root/root 0 2015-10-18 14:52 ./ drwxr-xr-x root/root 0 2015-10-18 14:52 ./usr/ drwxr-xr-x root/root 0 2015-10-18 14:52 ./usr/share/ drwxr-xr-x root/root 0 2015-10-18 14:52 ./usr/share/doc/ drwxr-xr-x root/root 0 2015-10-18 14:52 ./usr/share/doc/netutils/ -rw-r--r-- root/root 141 2015-10-18 14:47 ./usr/share/doc/netutils/changelog.gz -rw-r--r-- root/root 183 2015-10-18 14:47 ./usr/share/doc/netutils/README.Debian -rw-r--r-- root/root 1401 2015-10-18 14:47 ./usr/share/doc/netutils/copyright |
Nothing really in the package except the default changelog, copyright and README file. Instead of just listing the contents, we can also extract a Debian archive to a local location with dpkg -x (aka dpkg --extract):
|
1 2 3 4 5 6 7 8 9 10 11 |
# Extract the archive without installing it $ dpkg -x ../netutils_1.0.0_amd64.deb ../netutils_extracted $ find ../netutils_extracted/ ../netutils_extracted/ ../netutils_extracted/usr ../netutils_extracted/usr/share ../netutils_extracted/usr/share/doc ../netutils_extracted/usr/share/doc/netutils ../netutils_extracted/usr/share/doc/netutils/copyright ../netutils_extracted/usr/share/doc/netutils/changelog.gz ../netutils_extracted/usr/share/doc/netutils/README.Debian |
2.3. Install the (empty) package
Enough playing around with the .deb file. Let’s install it with the dpkg -i (aka dpkg --install) command:
|
1 2 3 4 5 |
# Install the (empty) package $ sudo dpkg -i ../netutils_1.0.0_amd64.deb Preparing to unpack ../netutils_1.0.0_amd64.deb ... Unpacking netutils (1.0.0) ... Setting up netutils (1.0.0) ... |
Done. That installed the package. Check out that it was actually installed by listing the installed packages with dpkg -l (aka dpkg --list). The list itself will contain all installed (or half-installed/configured) packages on the system, so we’ll use grep to limit the output:
|
1 2 3 4 5 6 7 8 9 10 11 |
# Proof that it's actually installed $ dpkg -l | grep netutils ii netutils 1.0.0 amd64 <insert up to 60 chars description> # ^^ ^ ^ ^ ^ # || | | | | # || | | | - Description # || | | - Architecture # || | - Version # || - Package name # | - Actual/current package state (n = not installed, i = installed, ...) # - Desired package state (i = install, r = remove, p = purge, ...) |
The columns in the list are desired package state, actual package state, package name, package version, package architecture and a short package description. If all is well, the first column will contain ii, which means that the package is properly installed. The dpkg-query man page (man dpkg-query) contains all the possible desired/actual state values.
Now that the package is installed, you can list its contents with the dpkg -L (aka dpkg --listfiles) command. Unlike dpkg -c, it only works for installed packages:
|
1 2 3 4 5 6 7 8 9 10 |
# List of installed Debian package contents $ dpkg -L netutils /. /usr /usr/share /usr/share/doc /usr/share/doc/netutils /usr/share/doc/netutils/copyright /usr/share/doc/netutils/changelog.gz /usr/share/doc/netutils/README.Debian |
2.4. Adding files and updating the changelog
Okay, enough with the empty package. Let’s now add actual files to our package. To do that, let’s create a folder files/ and use it to mirror the Linux filesystem structure. In that folder, let’s create our script files/usr/bin/ipaddr:
|
1 2 3 4 5 |
$ mkdir -p files/usr/bin $ touch files/usr/bin/ipaddr $ chmod +x files/usr/bin/ipaddr $ vi files/usr/bin/ipaddr # Script contents see below |
Obviously, you can add whatever you want to your script, but for the sake of this tutorial, we’ll go with a short script to grab the public IP address from a service called ipify. It provides an API to return the IP address in various formats. We’ll grab it with curl in JSON and then use jq to parse out the ‘ip’ field:
|
1 2 |
#!/bin/bash curl --silent 'https://api.ipify.org?format=json' | jq .ip --raw-output |
If we were to rebuild the package now, the dpkg-buildpackage command wouldn’t know which files to include in the package. So we’ll create the debian/install file to list directories to include (e.g. vi debian/install):
|
1 |
files/usr/* usr |
This basically means that everything in the files/usr/ folder will be installed at /usr/ on the target file system when the package is installed.
Once this is done, we could just rebuild and reinstall the package, but let’s go one step further and update the version of the package to 1.1.0. Versions are handled by the debian/changelog file. You can update it manually, or use the dch script (short for “Debian changelog”) to do so:
|
1 2 3 4 5 6 7 8 9 10 11 12 13 14 15 16 |
# We changed the package, let's update the version and changelog for it to 1.1.0 $ dch -im # Opens the editor ... $ cat debian/changelog netutils (1.1.0) unstable; urgency=medium * Added 'ipaddr' script -- Philipp Heckel <phil@example.com> Sun, 18 Oct 2015 15:55:42 +0100 netutils (1.0.0) unstable; urgency=low * Initial Release. -- Philipp Heckel <phil@example.com> Sun, 18 Oct 2015 15:06:29 +0100 |
While the changelog looks just like a dumb text file, Debian uses it to manage the version number of the package, as well as to define the distribution(s) that the package is built for (here: “unstable”). Furthermore, it defines who has to sign the package (name of changelog editor).
After that, let’s rebuild and reinstall the package:
|
1 2 3 4 5 |
# Rebuild & re-install package $ dpkg-buildpackage $ sudo dpkg -i ../netutils_1.1.0_amd64.deb $ dpkg -l | grep netutils ii netutils 1.1.0 amd64 <insert up to 60 chars description> |
Looks like it installed correctly. Let’s check if the ipaddr script is where it’s supposed to be. And then let’s try to run it:
|
1 2 3 4 5 6 7 |
# Proof that it's where it's supposed to be $ which ipaddr /usr/bin/ipaddr # Now let's run it $ ipaddr /usr/bin/ipaddr: line 3: jq: command not found |
Oops! We forgot that not every system might have jq installed. Let’s add it as a dependency!
2.5. Updating the description and adding dependencies
Each Debian package can depend on other packages. In the case of our ipaddr script, we use the curl and jq commands, so the ‘netutils’ package depends on these commands.
Since typically the command name is different from the package name, it might be necessary to find the actual package name. This can be done with the dpkg -S (aka dpkg --search) command:
|
1 2 3 4 5 6 7 8 9 |
# Find the full path for the 'curl' command $ which curl /usr/bin/curl # Seems that the 'curl' command is contained in a package called 'curl' $ dpkg -S /usr/bin/curl curl: /usr/bin/curl # The same can be done for 'jq' if it's installed. |
To add the dependencies to the ‘netutils’ package, edit the Depends: section in the debian/control file (e.g. via vi debian/control):
|
1 2 3 4 5 6 7 8 9 10 11 12 |
Source: netutils Section: utils Priority: optional Maintainer: Philipp Heckel <phil@example.com> Build-Depends: debhelper (>= 8.0.0) Standards-Version: 3.9.4 Package: netutils Architecture: any Depends: ${shlibs:Depends}, ${misc:Depends}, curl, jq Description: Network management tools Includes various tools for network management. |
That’s it. All that’s left (again) is to update the version to 1.2.0, rebuild the package and reinstall it:
|
1 2 3 4 5 6 7 8 9 10 11 12 13 |
# Rebuild & re-install package $ dch -im $ dpkg-buildpackage $ sudo dpkg -i ../netutils_1.2.0_amd64.deb Preparing to unpack ../netutils_1.2.0_amd64.deb ... Unpacking netutils (1.2.0) over (1.1.0) ... dpkg: dependency problems prevent configuration of netutils: netutils depends on jq; however: Package jq is not installed. dpkg: error processing package netutils (--install): dependency problems - leaving unconfigured Errors were encountered while processing: netutils |
Wow. What happened here?
Well, unlike apt-get install, the dpkg -i command does not automatically resolve and install missing dependencies. It just complains about them. That is perfectly normal and expected. In fact, it gives us the perfect opportunity to check the package state (like we did above):
|
1 2 3 4 5 6 7 8 |
# The package is in an invalid state: $ dpkg -l | grep netutils iU netutils 1.2.0 amd64 Network management tools # ^^ ^ # || | # || - Yeyy, the new description # | - Actual package state is 'U' / 'Unpacked' # - Desired package state is 'i' / 'install' |
As you can see by the output, the desired state for the package is ‘i’ (= installed), but the actual state is ‘U’ (= Unpacked). That’s not good. Luckily though, dependencies can be automatically resolved by apt-get install -f (aka apt-get install --fix-broken):
|
1 2 3 4 5 6 7 8 9 10 11 12 |
$ sudo apt-get install -f The following extra packages will be installed: jq The following NEW packages will be installed jq 0 to upgrade, 1 to newly install, 0 to remove and 11 not to upgrade. 1 not fully installed or removed. Selecting previously unselected package jq. Preparing to unpack .../jq_1.3-1.1ubuntu1_amd64.deb ... Unpacking jq (1.3-1.1ubuntu1) ... Setting up jq (1.3-1.1ubuntu1) ... Setting up netutils (1.2.0) ... |
Finally, it’s installed correctly. Now let’s test it:
|
1 2 3 4 5 6 7 |
# The package is installed correctly ('ii') $ dpkg -l | grep netutils ii netutils 1.2.0 amd64 Network management tools # And it seems to work! $ ipaddr 82.143.12.32 |
3. Create and use a Debian repository
3.1. dpkg -i vs. apt-get install
So why did we use dpkg -i and not apt-get install? Because apt-get install looks in all the configured Debian repositories; it does not look for files. And as of right now, there is no Debian repository serving the netutils package:
|
1 2 3 4 5 6 |
# There is no Debian repo serving the 'netutils' package! $ sudo apt-get install netutils Reading package lists... Done Building dependency tree Reading state information... Done E: Unable to locate package netutils |
3.2. Locally configured Debian/APT repositories (/etc/apt/sources.list.d/*.list)
So where does ‘apt-get install’ look? How does it know where to retrieve/download the packages and its dependencies from?
APT repositories are configured in the files /etc/apt/sources.list and /etc/apt/sources.list.d/*.list. On a typical Debian/Ubuntu system, there are quite a few of them:
|
1 2 3 4 5 6 7 |
$ find /etc/apt/sources.list /etc/apt/sources.list.d/ /etc/apt/sources.list /etc/apt/sources.list.d/ /etc/apt/sources.list.d/syncany.list /etc/apt/sources.list.d/archive.philippheckel.com.list /etc/apt/sources.list.d/official-package-repositories.list ... |
Each of these files contains a list of Debian repositories:
|
1 2 3 4 5 6 |
$ cat /etc/apt/sources.list.d/official-package-repositories.list deb http://archive.ubuntu.com/ubuntu trusty main restricted universe multiverse # ^ ^ ^ # | | | # - Main URL/source | - Component list (e.g. main, universe, ...) # - Distribution (e.g. precise, trusty, release, ...) |
3.3. The APT cache and Packages/Packages.gz files
Whenever apt-get update is called, all of these repos are checked for new versions. The APT cache (see apt-cache command) is refreshed:
|
1 2 3 |
$ apt-get update | grep Packages Hit http://archive.ubuntu.com trusty/main amd64 Packages ... |
The ‘Hit’ actually means that it downloaded/checked the Packages.gz file (in the example above from the URL http://archive.ubuntu.com/ubuntu/dists/trusty/main/binary-amd64/Packages.gz). The file looks like this:
|
1 2 3 4 5 6 7 8 9 10 11 12 13 14 15 16 |
$ curl -s http://archive.ubuntu.com/ubuntu/dists/trusty/main/binary-amd64/Packages.gz | zcat | head -n 14 Package: account-plugin-aim Priority: optional Section: gnome Installed-Size: 941 Maintainer: Ubuntu Developers <ubuntu-devel-discuss@lists.ubuntu.com> Original-Maintainer: Debian Telepathy maintainers <pkg-telepathy-maintainers@lists.alioth.debian.org> Architecture: amd64 Source: empathy Version: 3.8.6-0ubuntu9 Replaces: account-plugin-empathy Depends: empathy (= 3.8.6-0ubuntu9), telepathy-haze, mcp-account-manager-uoa, unity-asset-pool (>> 0.8.24daily13.03.20.1) Breaks: account-plugin-empathy Filename: pool/main/e/empathy/account-plugin-aim_3.8.6-0ubuntu9_amd64.deb Size: 8838 ... |
Looks familiar? Yes! A Packages.gz file looks very, very similar to the debian/control file in our package. And that’s no coincidence.
3.4. Creating a local Debian repository
So in a nutshell, all we need to create a Debian repository is a Packages.gz file and a way to expose this file — either via HTTP or locally. Easy, easy, easy!
For the sake of this tutorial, let’s create a local repository at /tmp/repo and copy all the netutils_*.deb files to it. Once that is done, we’ll create a Packages.gz file using the dpkg-scanpackages command:
|
1 2 3 4 |
$ mkdir /tmp/repo $ cp ../netutils_*.deb /tmp/repo/ $ cd /tmp/repo $ dpkg-scanpackages -m . | gzip --fast > Packages.gz |
That’s it. Let’s check what the Packages.gz file looks like:
|
1 2 3 4 5 6 7 8 9 10 11 12 13 14 15 16 17 18 19 20 21 22 23 24 25 26 |
$ zcat /tmp/repo/Packages.gz $ zcat Packages.gz Package: netutils Version: 1.0.0 Architecture: amd64 Maintainer: Philipp Heckel <phil@example.com> Installed-Size: 2 Filename: ./netutils_1.0.0_amd64.deb Size: 1994 MD5sum: 1de1a751a5bc0c9892e3e7c7740c57a9 SHA1: 2ea91ec16519638fcfd371d1530fe13aaa123f49 SHA256: c40ea5184715e6d6cdf946fd66e84c19c4b0d7f516fe6842d57da385af7fc180 Section: unknown Priority: optional Homepage: <insert the upstream URL, if relevant> Description: <insert up to 60 chars description> <insert long description, indented with spaces> Package: netutils Version: 1.1.0 Architecture: amd64 Maintainer: Philipp Heckel <phil@example.com> Installed-Size: 2 Depends: curl, jq Filename: ./netutils_1.1.0_amd64.deb ... |
3.5. Adding the local Debian repository and installing via apt-get install
All that’s left is to add that repository to the local APT config by adding a *.list file, e.g. at /etc/apt/sources.list.d/local.list:
|
1 |
deb file:/tmp/repo ./ |
Now we can install the netutils package via apt-get install:
|
1 2 3 4 5 6 7 |
# Update the APT cache and install the package $ apt-get update $ sudo apt-get install netutils # Yup, it works $ ipaddr 82.143.12.32 |
3.6. Listing and installing older versions
Maybe you noticed that the Packages.gz file contained multiple versions of the package. That means that we can actually list and install specific/older versions of the package if we wanted to.
Let’s explore what versions we could install. This can be done with apt-cache policy or apt-cache madison:
|
1 2 3 4 5 6 7 8 9 10 11 12 13 14 15 16 17 18 19 |
# You can use 'apt-cache policy' to display all available versions $ apt-cache policy netutils netutils: Installed: 1.2.0 Candidate: 1.2.0 Version table: *** 1.2.0 0 500 file:/tmp/repo/ ./ Packages 100 /var/lib/dpkg/status 1.1.0 0 500 file:/tmp/repo/ ./ Packages 1.0.0 0 500 file:/tmp/repo/ ./ Packages # The 'apt-cache madison' command does the same $ apt-cache madison netutils netutils | 1.2.0 | file:/tmp/repo/ ./ Packages netutils | 1.1.0 | file:/tmp/repo/ ./ Packages netutils | 1.0.0 | file:/tmp/repo/ ./ Packages |
By default apt-get install always picks the newest one, but by doing apt-get install netutils=1.0.0, we could tell it to install version 1.0.0:
|
1 2 3 4 5 6 7 8 9 10 11 12 13 14 15 |
$ sudo apt-get install netutils=1.0.0 Reading package lists... Done Building dependency tree Reading state information... Done The following packages will be DOWNGRADED: netutils 0 to upgrade, 0 to newly install, 1 to downgrade, 0 to remove and 13 not to upgrade. Need to get 0 B/1,994 B of archives. After this operation, 0 B of additional disk space will be used. Do you want to continue? [Y/n] y dpkg: warning: downgrading netutils from 1.2.0 to 1.0.0 (Reading database ... 208809 files and directories currently installed.) Preparing to unpack ..././netutils_1.0.0_amd64.deb ... Unpacking netutils (1.0.0) over (1.2.0) ... Setting up netutils (1.0.0) ... |
3.7. Normal/typical repository layout
Our local repository is very basic. It does not have the same sophisticated structure of a normal repository such as the main upstream Ubuntu repository. Normal repositories looks more like this:
|
1 2 3 4 5 6 7 8 9 10 11 12 13 14 15 16 17 18 19 20 |
$ find dists/trusty/ -maxdepth 3; find pool/ -maxdepth 1 dists/trusty dists/trusty/Release.gpg dists/trusty/Release dists/trusty/InRelease dists/trusty/main dists/trusty/main/binary-amd64 dists/trusty/main/binary-amd64/Packages dists/trusty/main/binary-amd64/Release dists/trusty/main/binary-amd64/Packages.bz2 dists/trusty/main/binary-amd64/Packages.diff dists/trusty/main/binary-amd64/Packages.gz dists/trusty/main/Contents-amd64.bz2 dists/trusty/main/Contents-amd64 dists/trusty/main/Contents-amd64.gz dists/trusty/Contents-amd64.bz2 dists/trusty/Contents-amd64 dists/trusty/Contents-amd64.gz pool/ pool/main |
If you really wanted to, you could create that structure yourself. For the fun of it, let’s do that with our repository at /tmp/repo. Remember, this is what it looks like:
|
1 2 3 4 5 6 |
$ find /tmp/repo/ | sort /tmp/repo/ /tmp/repo/netutils_1.0.0_amd64.deb /tmp/repo/netutils_1.1.0_amd64.deb /tmp/repo/netutils_1.2.0_amd64.deb /tmp/repo/Packages.gz |
Now to “transform” it:
|
1 2 3 4 5 6 7 8 9 10 11 12 13 |
# Delete the old Packages.gz file $ rm Packages.gz # Create new structure $ mkdir -p pool/main/n dists/trusty/main/binary-{amd64,i386} $ mv *.deb pool/main/n # Create new Packages.gz files $ dpkg-scanpackages -m pool | gzip > dists/trusty/main/binary-amd64/Packages.gz dpkg-scanpackages: info: Wrote 3 entries to output Packages file. $ dpkg-scanpackages -m pool | gzip > dists/trusty/main/binary-i386/Packages.gz dpkg-scanpackages: info: Wrote 3 entries to output Packages file. |
After that, the directory structure of our almost-proper repository looks like this:
|
1 2 3 4 5 6 7 8 9 10 11 12 13 14 15 |
# find /tmp/repo/ | sort /tmp/repo/ /tmp/repo/dists /tmp/repo/dists/trusty /tmp/repo/dists/trusty/main /tmp/repo/dists/trusty/main/binary-amd64 /tmp/repo/dists/trusty/main/binary-amd64/Packages.gz /tmp/repo/dists/trusty/main/binary-i386 /tmp/repo/dists/trusty/main/binary-i386/Packages.gz /tmp/repo/pool /tmp/repo/pool/main /tmp/repo/pool/main/n /tmp/repo/pool/main/n/netutils_1.0.0_amd64.deb /tmp/repo/pool/main/n/netutils_1.1.0_amd64.deb /tmp/repo/pool/main/n/netutils_1.2.0_amd64.deb |
Then, we obviously need to update our sources .list file at /etc/apt/sources.list.d/local.list:
|
1 |
deb file:/tmp/repo trusty main |
The best tutorial ever!
Great :-) thx for this well written and concise post!
thanks for this wonderful post. my intension is to create my personal repository that requests username/password authentication.
would be nice of you would responsd with advise.
thanks again. your article was very impressive.
Excellent post! A very good explanation about deb packages and good explanation about repositores!
Why there is no netutils_1.0.0_orig.tar.gz?
Dear Philipp
Thanks, thanks, thanks, God bless you, bro. your tutorial really helps me.
Your tutorial is excellent.
Hi, great guide.
Any chance you could add how to create release files, sign everything properly, to create a proper apt repository?
Thanks for this tutorial.
I would like just to add this comment for those that haven’t dch and dpkg-buildpackage commands in their systems.
To build a Debian package with source code some software packages are required on your system.
As user
rootyou can install these using the following command:# apt-get install build-essential autoconf automake autotools-dev dh-make debhelper devscripts fakeroot xutils lintian pbuilder